Saturday, November 13, 2010

Looking Back I Forgot To Post A Step . . .

I did draw everything out in CAD (SolidWorks) to start.  This was the first time I have ever done it this way and I liked it.  I got to think through a lot of the problems before having to deal with them during the build.  This has saved me time and material.  As you know; material is expensive and my time is priceless.  

Friday, November 12, 2010

The Problem: episode 1, part 10 (Holy Crap It's Starting To Look Like Something!)


I got all of the mortise and tenon joints to fit nicely.  It was a lot of work but worth it.


Because now I have something to show for all of the work I've been doing.


Still have a lot of work left, but it's all shaping and finishing.  The hard part is done.

Posted by Picasa

Thrift Store Find 001


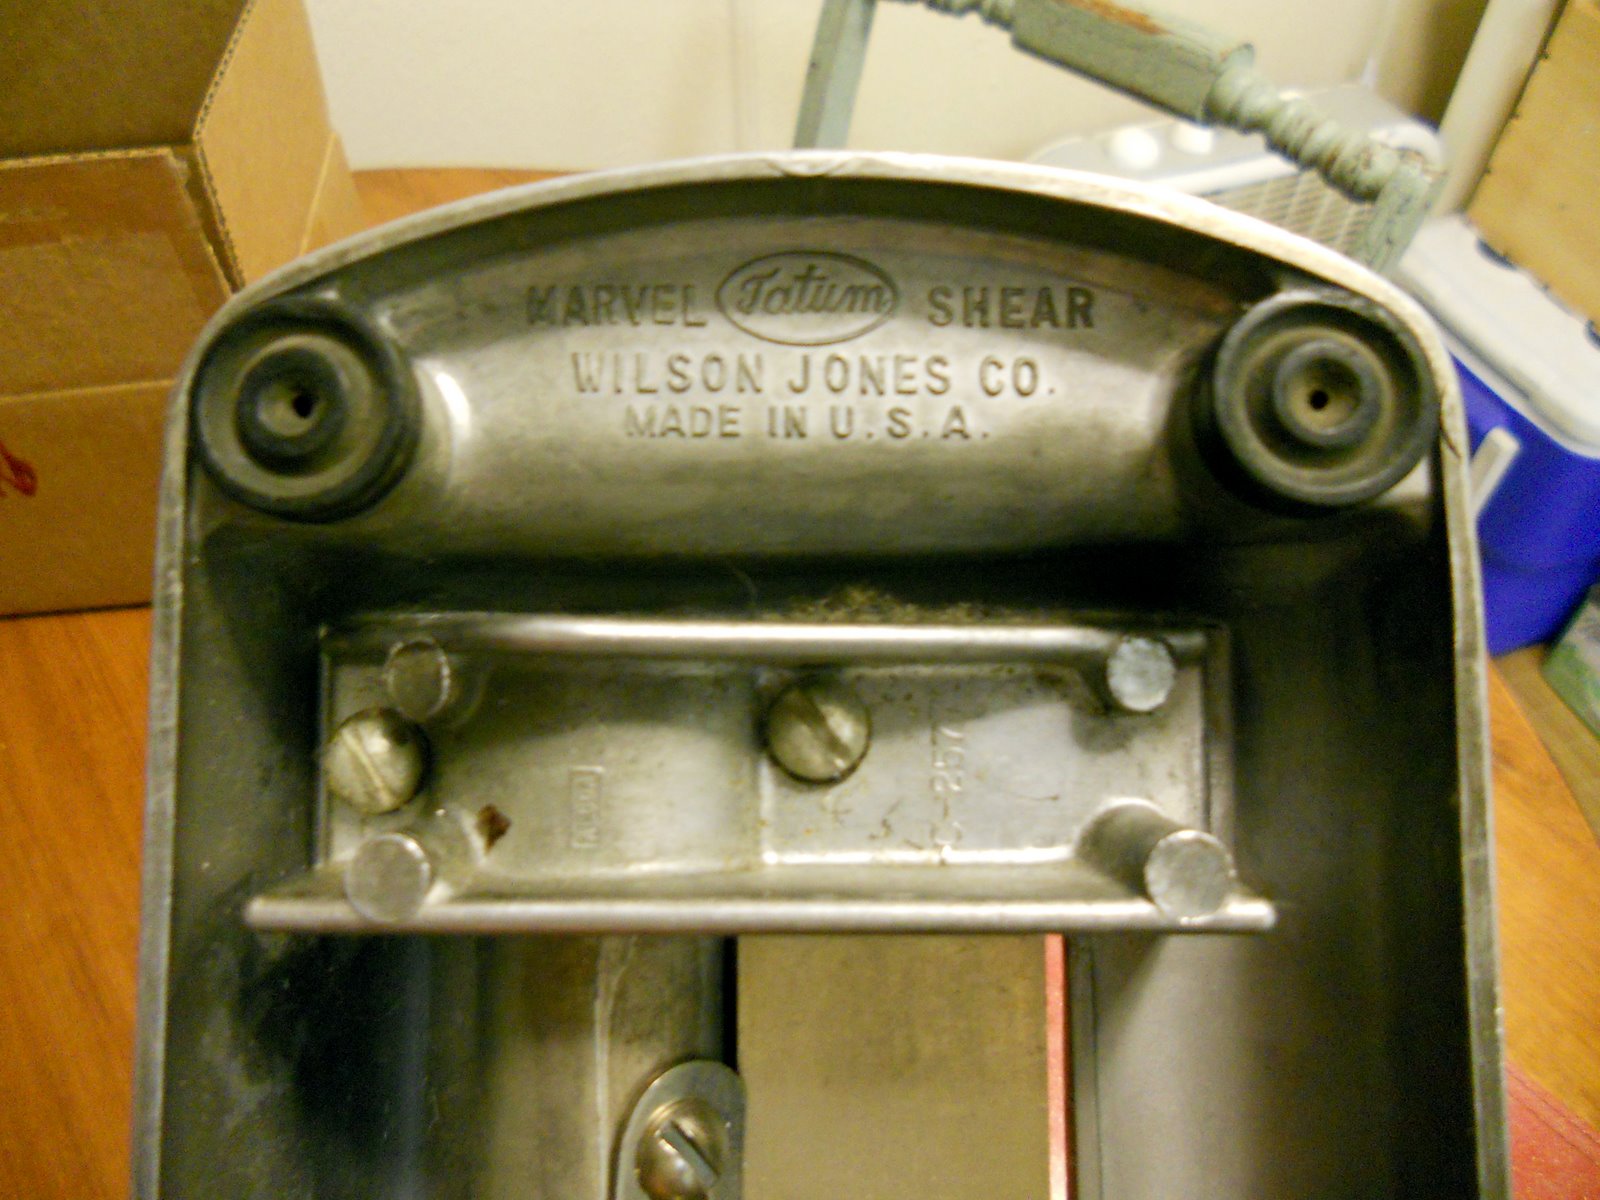
So I found this shear at the local thrift store the other day.  I'm still trying to figure out what it was originally used for (and what I can use it for).  It was tagged $4.99 and was 50% off of that; how couild I go wrong?  It's made of heavy cast aluminum and has a rotating shear to cut "stuff".  I have found it takes 1/32" off of the edge of a piece of poster board at a time.  Yeah, I'm going to have to file this one under "shit my wife wants me to get rid of".


Marvel "Tatum" Shear
Wilson Jones Co.
Made in U.S.A.


Sold and installed by
Coppress Heating & Refrigeration
Arlington, Virginia

It's well made and I will find a use for it.
Posted by Picasa

Thursday, November 11, 2010

Gesture: Hand Drawings by Architects

Gesture: Hand Drawings by Architects is a good little article over at Design Milk.  I always like seeing what the sketches of other fields and designers are like.  Here's a peek at one.

Wednesday, November 10, 2010

Another idea sketch for The Problem


A (very) rough sketch of an idea I had for the upper half of my computer desk.  It's based on a desk in a box that I saw in a local vintage furniture store.
I nice box when closed.  Could be anything inside.
Open it up and start pulling and unfolding.

And it becomes some of my favorite kind of furniture.  Well designed and incredibly thought out.  This was a nice find for me.  If I wasn't on a student's budget I could have afforded it.  But even if I could afford more furniture there is no way anything could fit in our already cramped apartment.


Posted by Picasa

The Problem: episode 1, part 9 (A Leg coming together)

I started fine tuning the tenons to fit.  Doing the work with a rasp and sand paper.

It took me about 30 minutes to get the leg foot to fit nicely. 


And in another 30 minutes the leg top is fitting nicely as well.  And It's starting to look like the leg I had drawn back in the day.  Nice.


And I must be doing something right because everything is in square. When I put the square in place and it's tight it makes me happy.
Posted by Picasa

Monday, November 8, 2010

The Problem: episode 1, part 8 (The Tenons)


Setting up the 12" radial arm saw with the dado.  This sucker has a 1" arbor (for those who care).  


I had to make a stop that would fit under the saw as it slides so I made a box that could easily be clamped to the saw's fence.  It's made of cherry because that's what I had for scrap.


All of my lines for what I need to cut.


I made a hand clamp for when I need to cut the boards vertically because they are twice as tall as the saw's fence and I needed to have them as stable as possible.
I made the hand clamp by cutting a cam like shape (increasing the radius from the center point) in the end of a long board.  Worked great.  It pressed the board firmly up against the lower part of the saw's fence and kept everything as solid as I wanted.

My First Video!


This is a video of me cutting the tenons for my desk.  Doing what I do best.  Making sawdust.  Shot with my Nikon point and shoot camera.  Good times.

Sunday, November 7, 2010

Obsession: Toolboxes

I ran across this forum about vintage toolboxes the other day when I was trying to find a good handle for the case I made for class.  I will post picks of my case when I get it back from grading (being a student again is great isn't it?).  I have a few obsessions in life.  Toolboxes and tool storage are right up there.  I now I have found some of my brethren.

The Ideal (Junior) Industrial Designer

This is from Strategic Aesthetic.  Check out the full article here.  An informative information design about what is sought after in a good Junior IDer.

Saturday, November 6, 2010

The Problem: episode 1, part 7 (Mortising, AKA- The Sqaure Hole Machine)


Some action shots of this cool machine at work.


Nice.  I could just hang this on my wall and call it done but it wouldn't solve my problem. Too bad though.  


The (almost) finished product.  And by "product" I mean mortise.
Posted by Picasa

The Problem: episode 1, part 6 (The Layout)


I drew everything up in SolidWorks (CAD) before I started.  Worked out a lot of the problems I would have ran into  otherwise.


Laid out the shapes for the everything.  These are the leg feet.


Then I laid out where I am putting my mortises.  Notice the beautifully strait lines.  Took me hours to achieve this effect.  But I wanted it to look nice for the camera.
Posted by Picasa

The Problem: episode 1, part 5 (joint, plain, and glue up)


The beautifully huge jointer at the wood shop and my ruff stock to the right.


After some plaining everything seem to be looking good.


Glue and clamp. . . and wait.
Posted by Picasa